Anyway, he has had the same teacher and teacher's assistants in his classroom for the last 3 years. He's moving on to another classroom next year so I wanted to do something special for them. It can't be easy getting him to do things he doesn't want to do 5 days a week! Therefore, I put together little gift baskets for them. I unexpectedly had his last day of school off, so I got to deliver them. It was a nice surprise. As I mentioned in my first post, I didn't take a picture of the final product. Oops. I'll do my best to make do without it.
A couple of months ago, I went to a craft fair with my best friend. When I was there, I spotted some notecard holders. They came with those pens that have fake flowers or fruit on the top. I've never been a fan of those pens; I find them much too heavy to use regularly. Anyway, I quickly realized I could easily duplicate the notecard holders at a much cheaper cost. They were just cheap acrylic photo frames laid down with the front facing up and decorated. Here's a picture of the original:
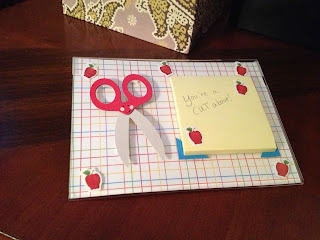
I went out that same afternoon and got the supplies. From AC Moore, I got acrylic photo frames for $1/each. I also got some scrapbook paper I liked for the background. Stickers were on sale 2/$1 so I picked up a few school themed packages. I knew I was going to use my Cricut to make some bigger school themed decorations, so I also bought Glue Dots so they would be 3D. Here are some shots of them:
One of them had a pencil and pencil stickers. I wrote "You've got the WRITE stuff!" on the first note.
Then there was the scissors one, which is decorated with apple stickers. I wrote "You're a CUT above!" on that one.
Then there was the glue version. Sigh. I could not, for the life of me, come up with any clever sayings using the words glue, or stick, or anything! So I just wrote, "Thanks for all you do!" and decorated it with star stickers.
I used my Cricut Personal Electronic Cutter to cut the scissors, glue, and pencil. The images are from the Simply Charmed cartridge. It is easily one of my favorite cartridges! I love almost every image in it! They are all so cute with their smiley faces and rosy cheeks!
So, my step-by-step process was this: First, I cut the plaid paper to the size of the frames. I cut out triangles from the same paper and glued them with the plain side up to hold the note pads in place. Next I cut the dies with my Cricut and used the Glue Dots to put them in place. I added the stickers and the notes, and voila! The first items for the teachers were complete!
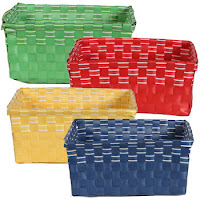
That's right, I said first items. I didn't stop there. I went to Dollar Tree and bought small apple-cinnamon scented candles. I also bought 3 red baskets to put everything in. Here are links to them: candle / basket
My next stop was the Christmas Tree Shop. I'm so glad I live in an area that has them! I love it! So does my mom. So does my best friend. My boyfriend doesn't even mind it! I picked up some apple scented hand soap there. Picking up on the theme of these gifts yet? I also got some red drink tumblers with straws for cold summer beverages. I couldn't get any pictures of those.
My final addition to the basket was a bit more daunting. I picked up some 4x6 magnetic photo frames at the Christmas Tree Shop for $0.89 each. I cut some white card stock to size and prepared the little artiste! I used a foam brush to paint red Crayola Washable Paint on the boy's hand and pressed it onto the card stock. He's not a big fan of arts and craft projects so I held my breath for this part! But he did great! He hates doing arts and crafts, but he loves showing them off when he's done! I added stems and leaves with Bic Mark It permanent markers and we had some awesome handprint apples! Here they are:
(I made 3, but wanted to show the frames I used for them also. I just love them!)
I recently painstakingly taught him how to write his name one letter at a time, so he was able to write that on the back for them. I think that made them even more special. His teacher loved them; she couldn't believe I got such clear prints. I think the key was that I applied the paint with a brush, rather than dipping his hand in the paint.
Here's a link to my inspiration for the prints:
So those were my teacher gifts! I am so, so happy with how they ended up. And this was my first actual crafting post, and my first time adding pictures! Thanks for looking!


